The Data Extracts screen is where you:
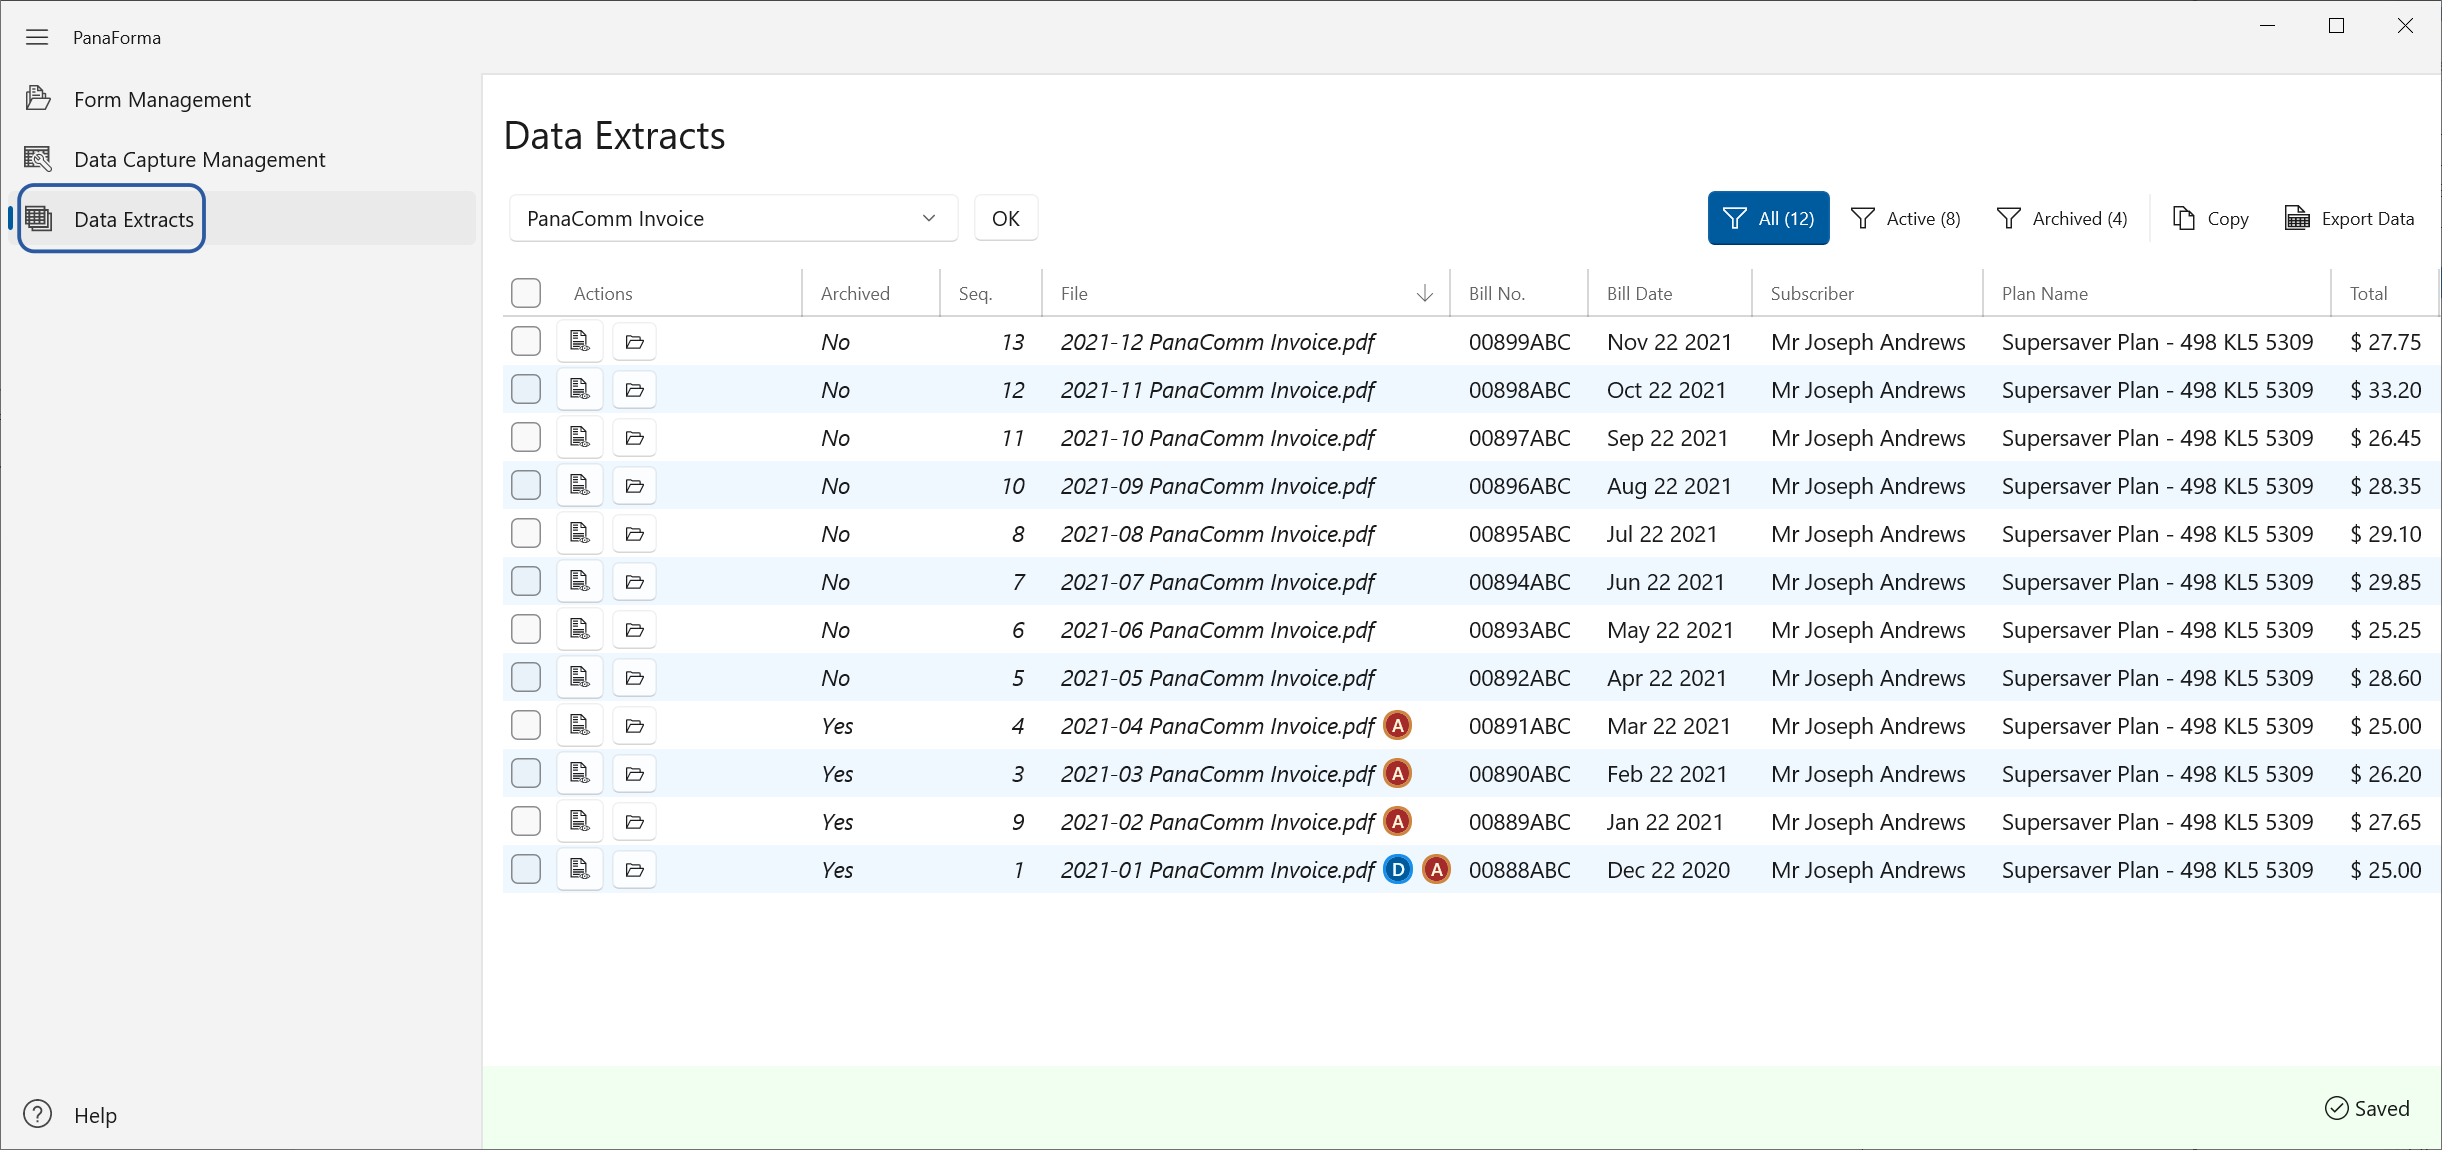
To view all the data captured for a Template, go to the Data Extracts screen using the navigation bar on the left side of the screen, then choose the required Template from the drop-down menu, and click OK. The data captured from forms with the Template applied will be loaded in a grid. Each row in the grid corresponds to a single PDF form file to which the Template has been applied.

Using the three buttons on the toolbar in the upper right corner of the screen you can filter the displayed rows to show all form data, active (i.e. non-archived) data, or archived data. Note that rows with archived data have a red "A" badge next to the PDF form file name. Also note that a form may be set as archived through its folder, its Template, or individually itself. Hover the mouse pointer over the Archive badge to see a tool-tip showing how a form is archived.
In the second-leftmost column each row has a button to view the corresponding PDF file on the Form Management page. Note that this button will be disabled if the form's folder is archived. Next to this is a button to open the form's folder in Windows Explorer.
To sort data in the grid, click the column headers. You can toggle the sort direction (ascending or descending) by repeatedly clicking on the column header. Note that the sort order in the grid will also be applied to the data copied to the clipboard or exported to file.
On the data grid you can edit any captured value by double clicking on its cell to enter edit mode, or by selecting the cell and pressing the F2 key. You can move the cell selection around the grid using the arrow keys on your keyboard. You can apply an edit and then move to the next cell by pressing the Enter key. Alternatively, you can press the Escape key to cancel a cell change.
Edited cells are not saved immediately. They will appear with a yellow background until saved. You can save or cancel your changes on a single row, or across the full grid using the buttons that appear when you have unsaved edits.
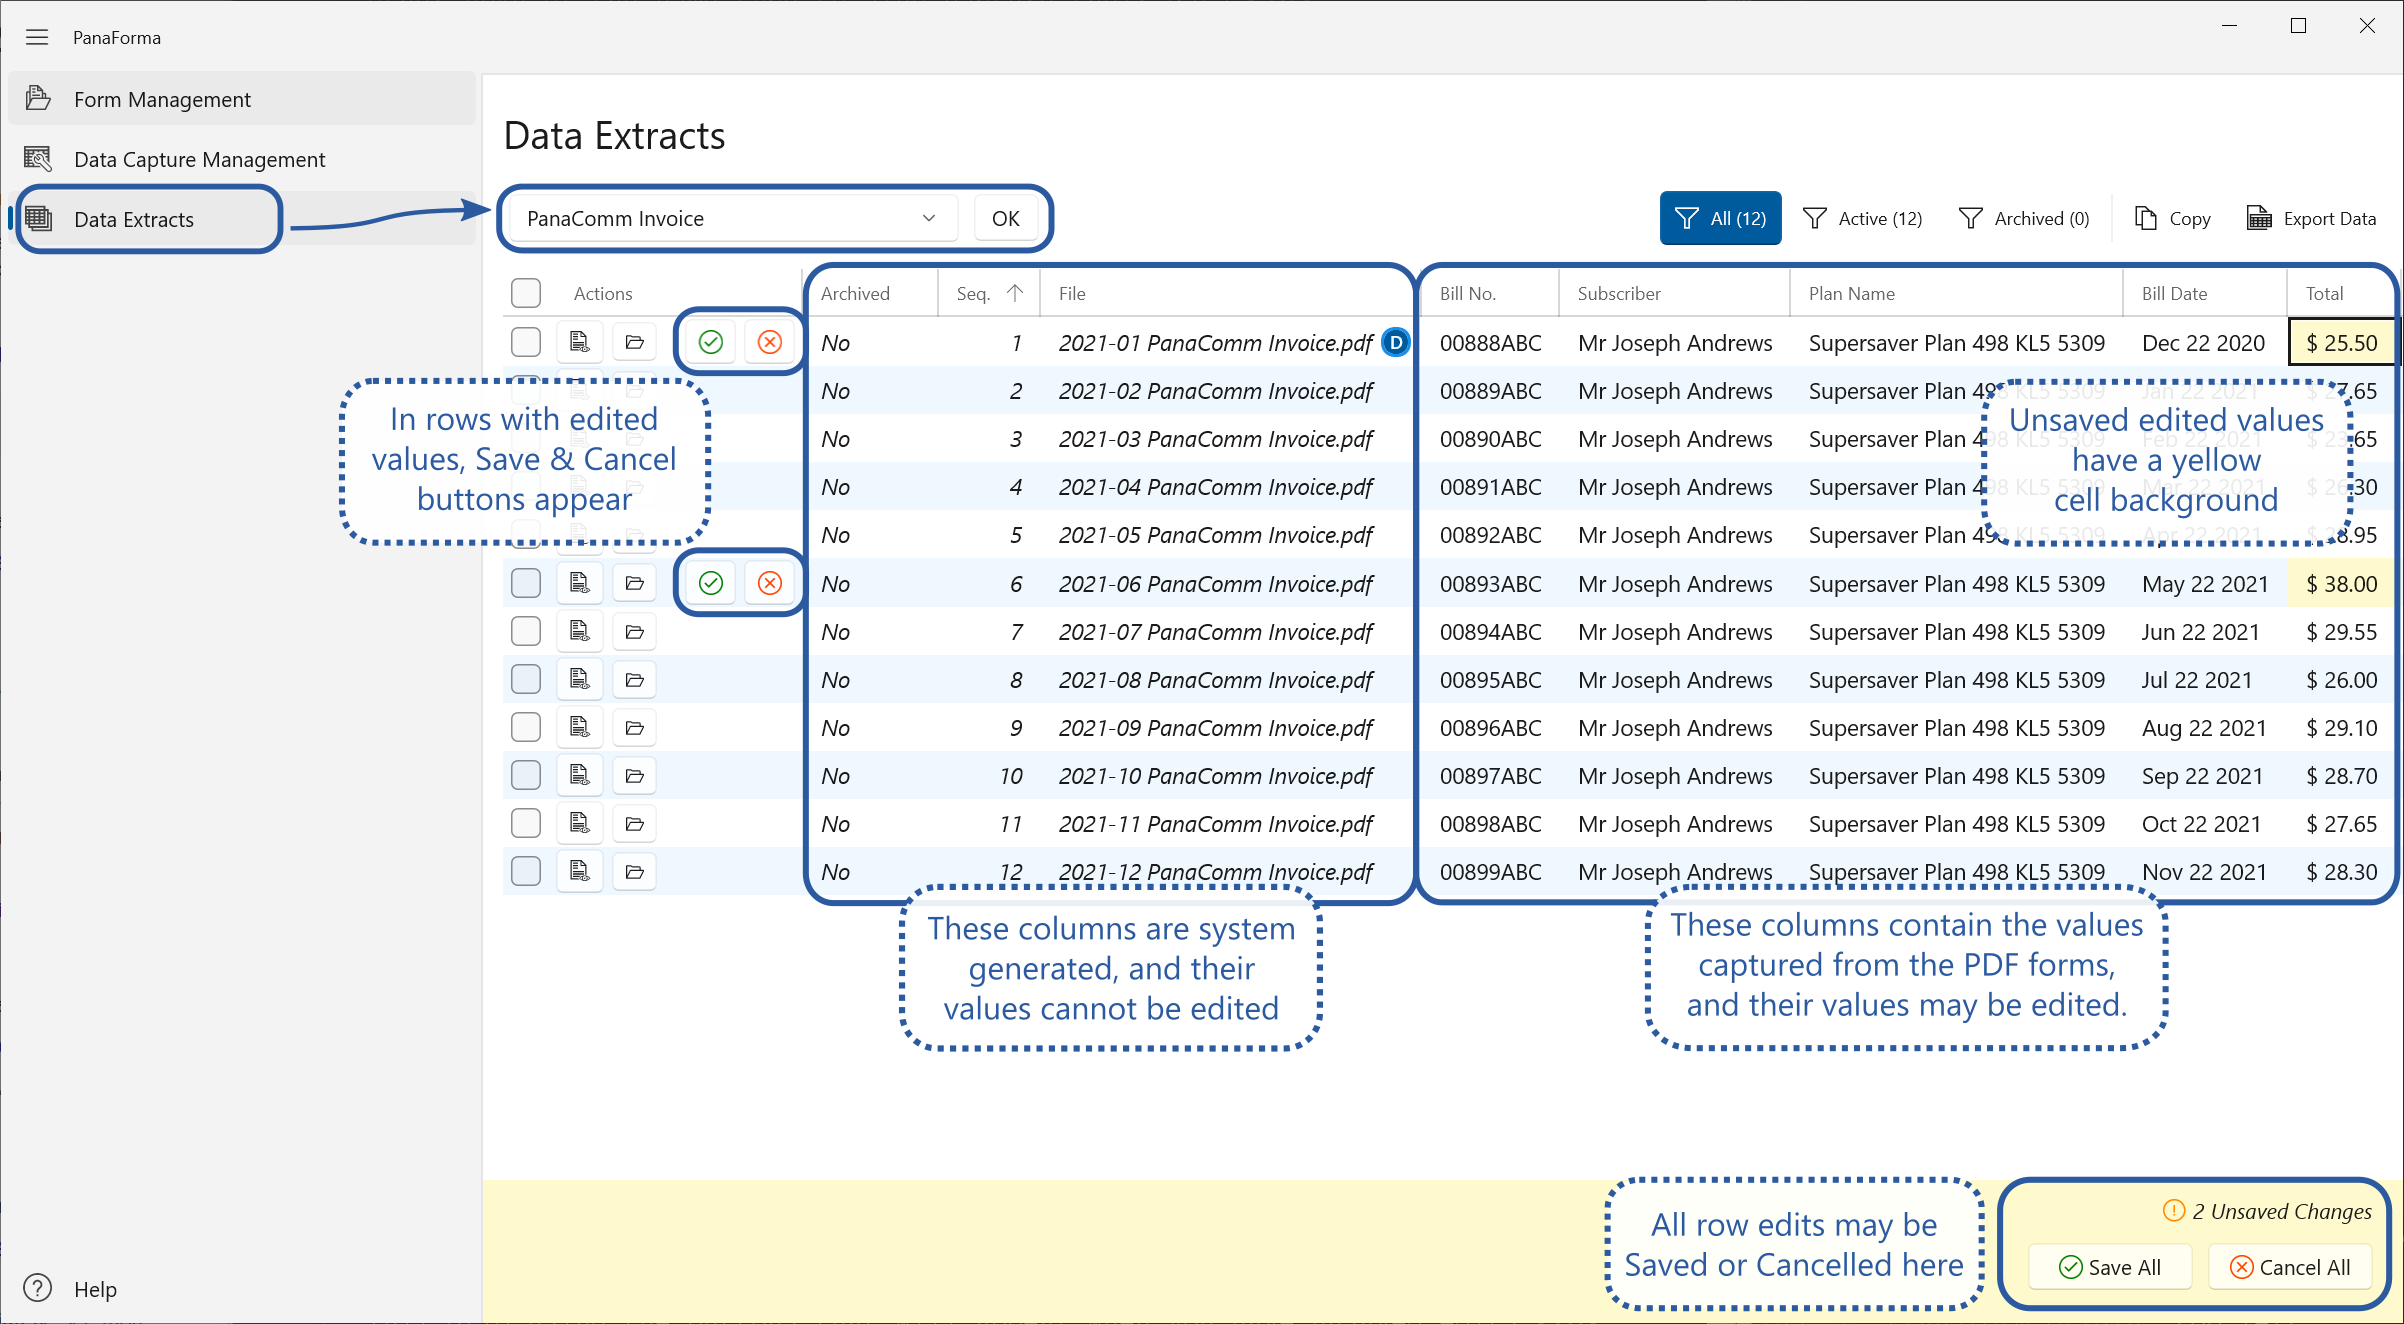
Note that the “Archived”, “Seq.”, and “File” column values on the left of the table cannot be edited, as they are set by PanaForma. The “Seq.” column gives the sequence number in which the Template was applied to the PDF forms. Sorting on this column allows you put the most recently processed forms at the top or bottom of the grid according to your preference.
Note: To copy data to the clipboard or export it to a file, a PanaForma subscription is required.
PanaForma offers a one-month free trial subscription to new users. If you decide to cancel the subscription during the free trial period, you will not be charged.
A subscription is charged month-to-month with no long-term commitment required, or you can choose to pay anually to receive a discount. You may cancel your subscription before any renewal.
You may copy rows to the clipboard in order to paste them into other applications such as Word, Excel, PowerPoint, or any other Windows applications that allows pasting of clipboard data.
When copying rows to the clipboard, you may copy all the rows for a Template, or a limited selection. For a limited selection, use the checkboxes in the leftmost column to select the rows you want to copy. To copy rows to the clipboard, click the "Copy" button in the upper-right corner of the Data Extracts screen. On the drop-down menu that appears, you have the option of copying all the rows in the grid, or just selected rows (if any).
PanaForma supports exporting data to Excel (XLSX) and Comma-Separated-Values (CSV) file formats. You can choose to export all rows and columns, or a limited selection of each.
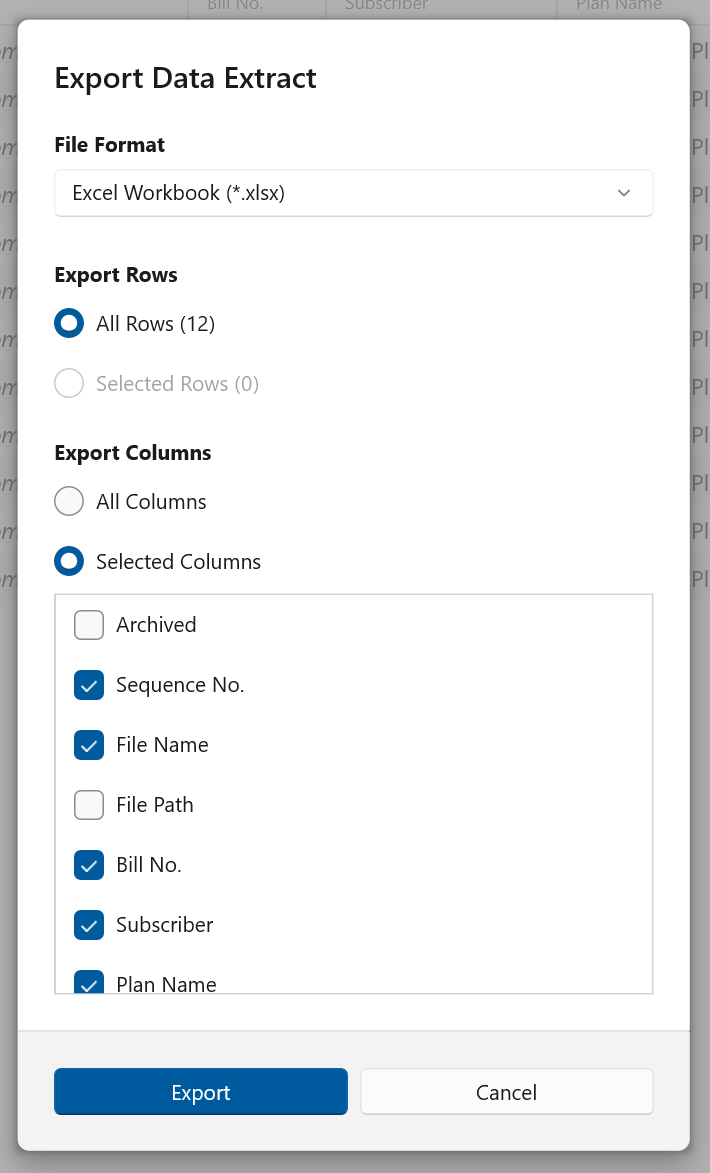
To export data to a file, click the "Export Data" button in the upper-right corner of the Data Extracts screen. An export options dialog will appear. Here you can choose the export file format (Excel or CSV), whether all or only selected rows are exported, and whether all or only selected columns are exported.
Click the Export button and a file save dialog will appear where you may choose the name and location where the file should be saved.